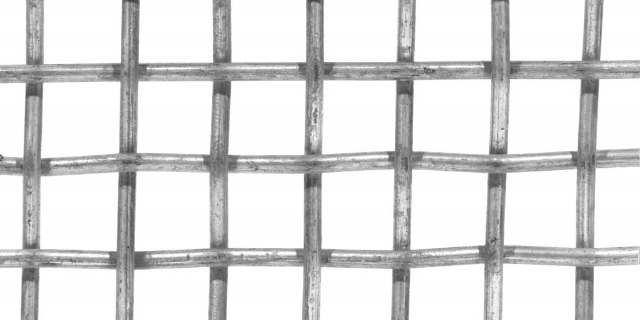
In construction and design, woven wire mesh has emerged as a mainstay. And while its allure is undeniable, correct installation is crucial to unlock its full potential. Here, at Meshstore our mission transcends mere sales – we guide, inform, and equip you to master every mesh project.
The Wonders of Woven Wire Mesh
The foundations of any project lie in understanding your material. Woven wire mesh isn’t just any material; it’s a tapestry of strength and elegance.
Stainless Steel Woven Wire Mesh: Born from the fusion of chromium and steel, this mesh is a testament to durability. Its ability to resist rust makes it a prime choice for those in the beautiful yet occasionally harsh Australian coastal regions. Beyond resilience, its sleek appearance adds a touch of modern elegance to any space.
Prioritising Safety – At All Times
Woven wire mesh, while a versatile and powerful material, requires careful handling to prevent potential injuries. The delicate interlocking of wires can occasionally leave sharp protrusions or edges that can harm an unaware user. Moreover, when manipulating or cutting the mesh, there’s the risk of dislodging tiny wire fragments.
With safety as our foremost concern, here are some detailed guidelines to ensure that every interaction with wire mesh remains injury-free:
Gloves: Your First Line of Defence
Consider gloves as the first barrier between your skin and the potential hazards of the mesh. By wearing sturdy gloves, preferably made of cut-resistant material, you not only shield your hands but also enhance your grip on the mesh, ensuring better control while handling.
Eye Protection: More Than Just Precaution
When you’re cutting or modifying woven wire mesh, it’s not uncommon for small wire fragments to break free and become airborne. Safety goggles or glasses aren’t just recommended; they are imperative. They provide a protective shield for your eyes, ensuring that no fragments can make their way through.
Workspace: The Foundation of Safe Operations
Just as a chef needs a clean kitchen, anyone working with the wire mesh needs a clutter-free workspace. It’s essential to allocate a dedicated space, devoid of unnecessary items, where you can work on the mesh. Such a space allows you to have more mobility, visibility, focus, and storage.
Mastering the Installation Process of Welded or Woven Wire Mesh
Installing welded or woven wire mesh can vary depending on its application, but the general steps remain relatively consistent. Here are the steps for installing it, such as that commonly used for fencing:
Tools and Materials:
- Welded or Woven wire mesh roll
- Fence posts
- Hammer or post driver
- Wire cutters or tin snips
- U-nails or fence staples
- Tensioning device or come-along
- Gloves
Installation Steps:
- Prepare the Site: Clear the area where you plan to install the wire mesh. Remove any debris, brush, or obstructions.
- Set End/Corner Posts: Install your corner or end posts first. These will be the primary tension points for your mesh.
- Unroll the Wire Mesh: Starting at one end or corner post, begin unrolling the welded or woven wire mesh along the length of where your fence will be.
- Attach to the First Post:
- Stretch the Mesh: As you move from one post to the next, it’s crucial to keep the mesh tight. Use a tensioning device or come along to help stretch the mesh between posts. This will prevent sagging and keep the mesh taut.
- Secure to Intermediate Posts: Once the mesh is stretched appropriately, attach it to the intermediate posts using the same method as the end posts.
- Cut Excess Mesh: If you reach the end of your fence line and have extra mesh, use wire cutters or tin snips to cut off the excess.
- Install Top and Bottom Wires (Optional): Some installations may use a thicker wire at the top and bottom of the mesh for added stability. If this is the case, stretch and attach these wires after the mesh has been installed.
Do the final check. Walk along the fence and check for any loose areas. Adjust and tighten as necessary. Check out more of our blogs and products right here at MeshStore.
